3 months for 3 minutes
Animation is hard work
The British Super 8 enthusiast Colin Dewar made an animated movie called “Everything but …”. His short film was created within three months. And there is a very special thing about it: The entire strip was exposed with no additional editing on a single cartridge of Kodak Ektachrome 64 T.
“Everything but…” was intended to be thought provoking film primarily highlighting the interconnectivity of the world. I’ve always been fascinated by how things work and often wonder about the huge number of people involved in making even an object which everyone takes for granted. How did that paperclip get to your desk? Who designed the carton that your take away comes in? Who makes the machine that makes the spring in a clothes peg? I realized that even if you picked the simplest of objects, you could extend it outwards until everyone was involved somehow. All I needed to do was think of the most overlooked piece of rubbish that I could, work out how it was made and then how it extended to include everything and everyone.
William Blake could see the world in a grain of sand. How about the world in a cigarette butt! I knew roughly what I wanted the film to look like. As clear and crisp as possible. I also knew I wanted to use drawings to illustrate the story. However I thought that just filming drawings would look a bit static. I wanted some movement. Moving the camera around a large sheet of drawings would be ok, but what if the drawings appeared line by line and colour by colour. That would look good.
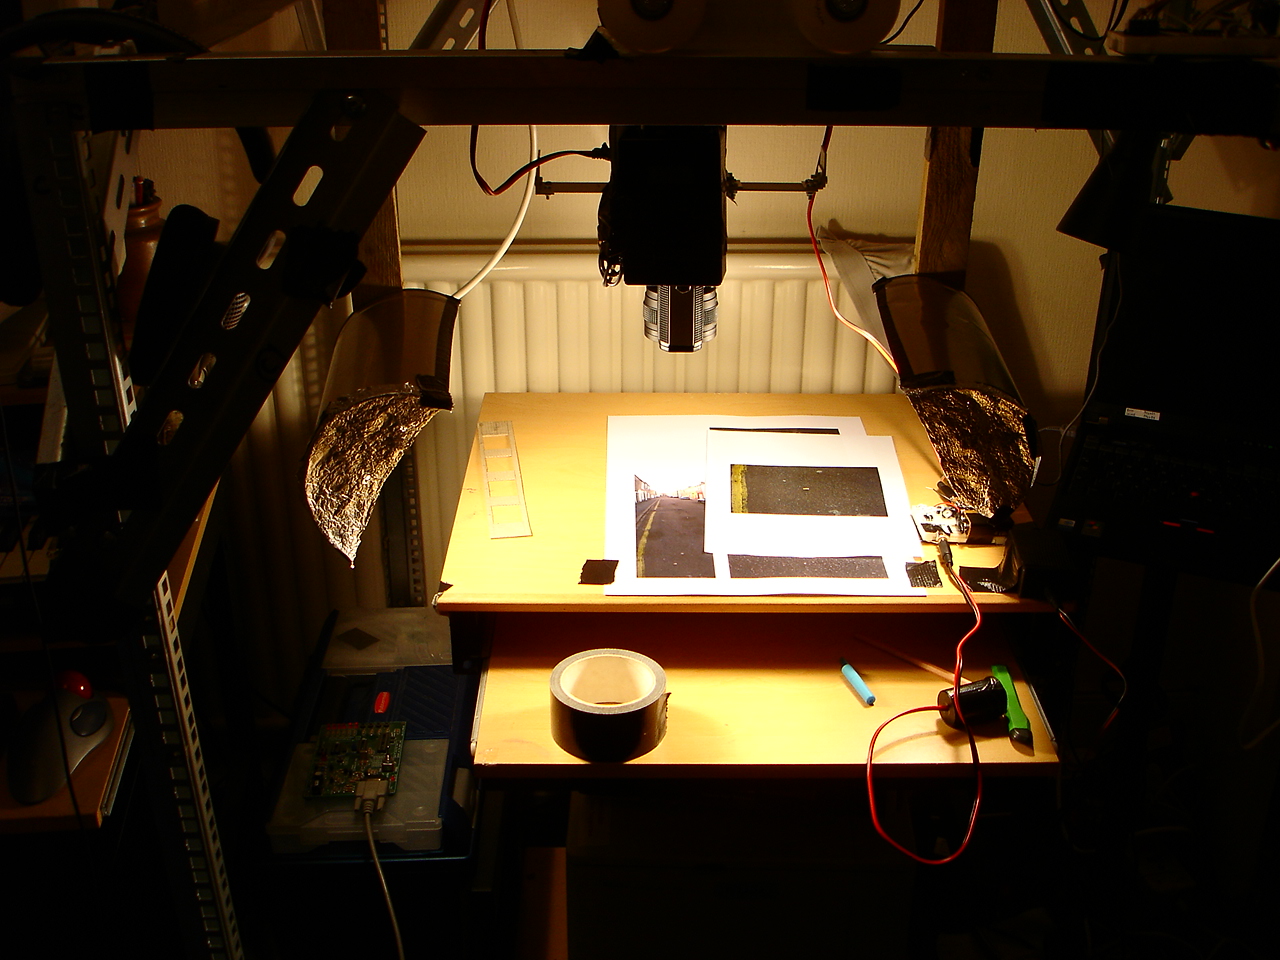
The project began in earnest in August 2006 with the construction of the rig to move the camera. This was constructed with Aluminium angle and pieces of an abandoned server cabinet. The frame was driven using a couple unipolar stepper motors salvaged from the local dump. They were originally from an abandoned disco light, but seemed to work fine. They were connected to some 12mm threaded rod supported by bearings. Extra long nuts were threaded onto this rod and then the other section of the rig rested on these nuts. The pitch of the threaded rod was 1mm, and so for every 200 steps of the motor (= 1 revolution) the rig would move by 1mm. The weight was supported by skate wheels and guide wheels. (If I were going to do this again, I would use some kind of linear bearing for extra guidance and smoothness).
Lighting wise, I started with 20w fluorescent eco bulbs. I was worried that the heat generated from a normal tungsten bulb would make it uncomfortable to work, and that the paper might warp.
After a camera test run I realized that the green cast from the fluorescent bulbs looks pretty bad. I was able to get hold of some colour correction filters, but I was beginning to run out of time and would not be able to shoot another test film. Therefore I had to stick to what I knew and bolted on a wooden frame containing 2 x 100W domestic tungsten bulbs, housed in homemade reflectors. This was a little ungainly, but I thought that it was the simplest solution. I made extra sure that everything was earthed and even put a smoke alarm above the rig, just incase things something went haywire.
I was looking for a reliable camera with macro and came across a reasonably priced Bauer S209XL on ebay. Although it had a nice macro, in the end I did not use this for reasons that will become clear later. I realised that I would need some kind of video assist for a couple of reasons. Firstly, I had no way of looking through the viewfinder when the camera was mounted on the rig and secondly, I wanted to be able to align the shots. I knew I wouldn’t be able to film the animation in one go and would have to film in sections and try to align them to each other in camera.
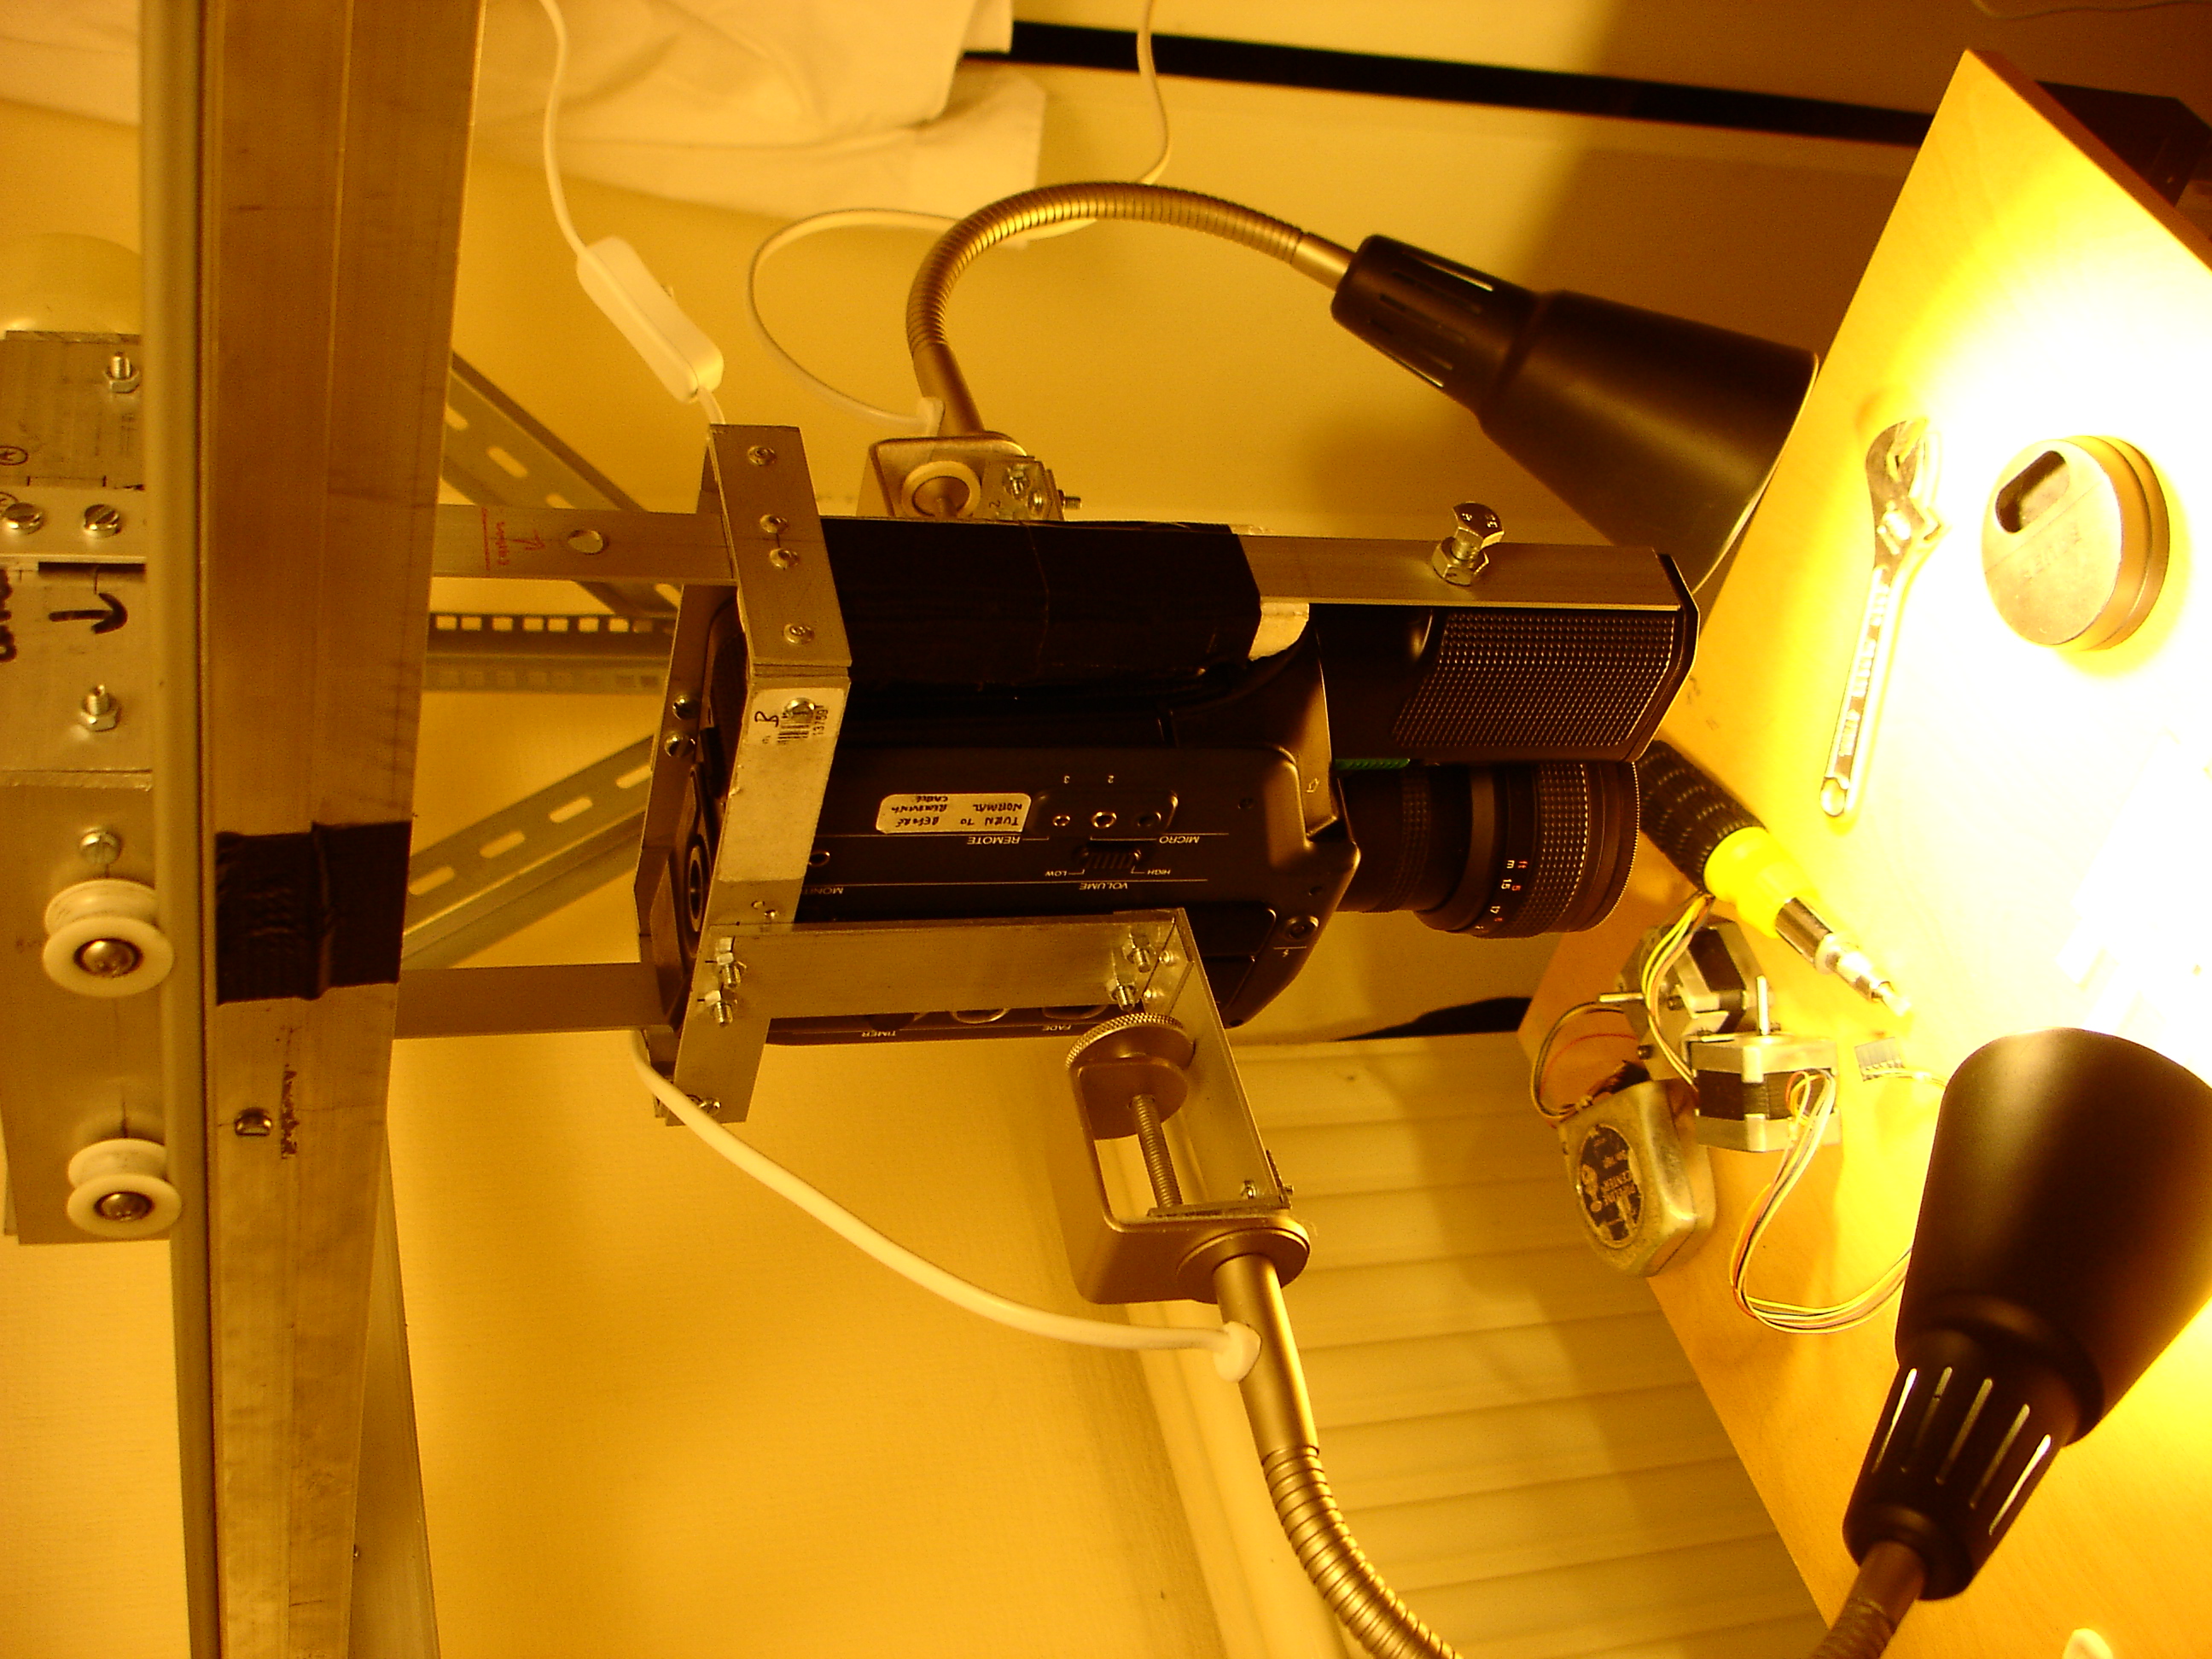
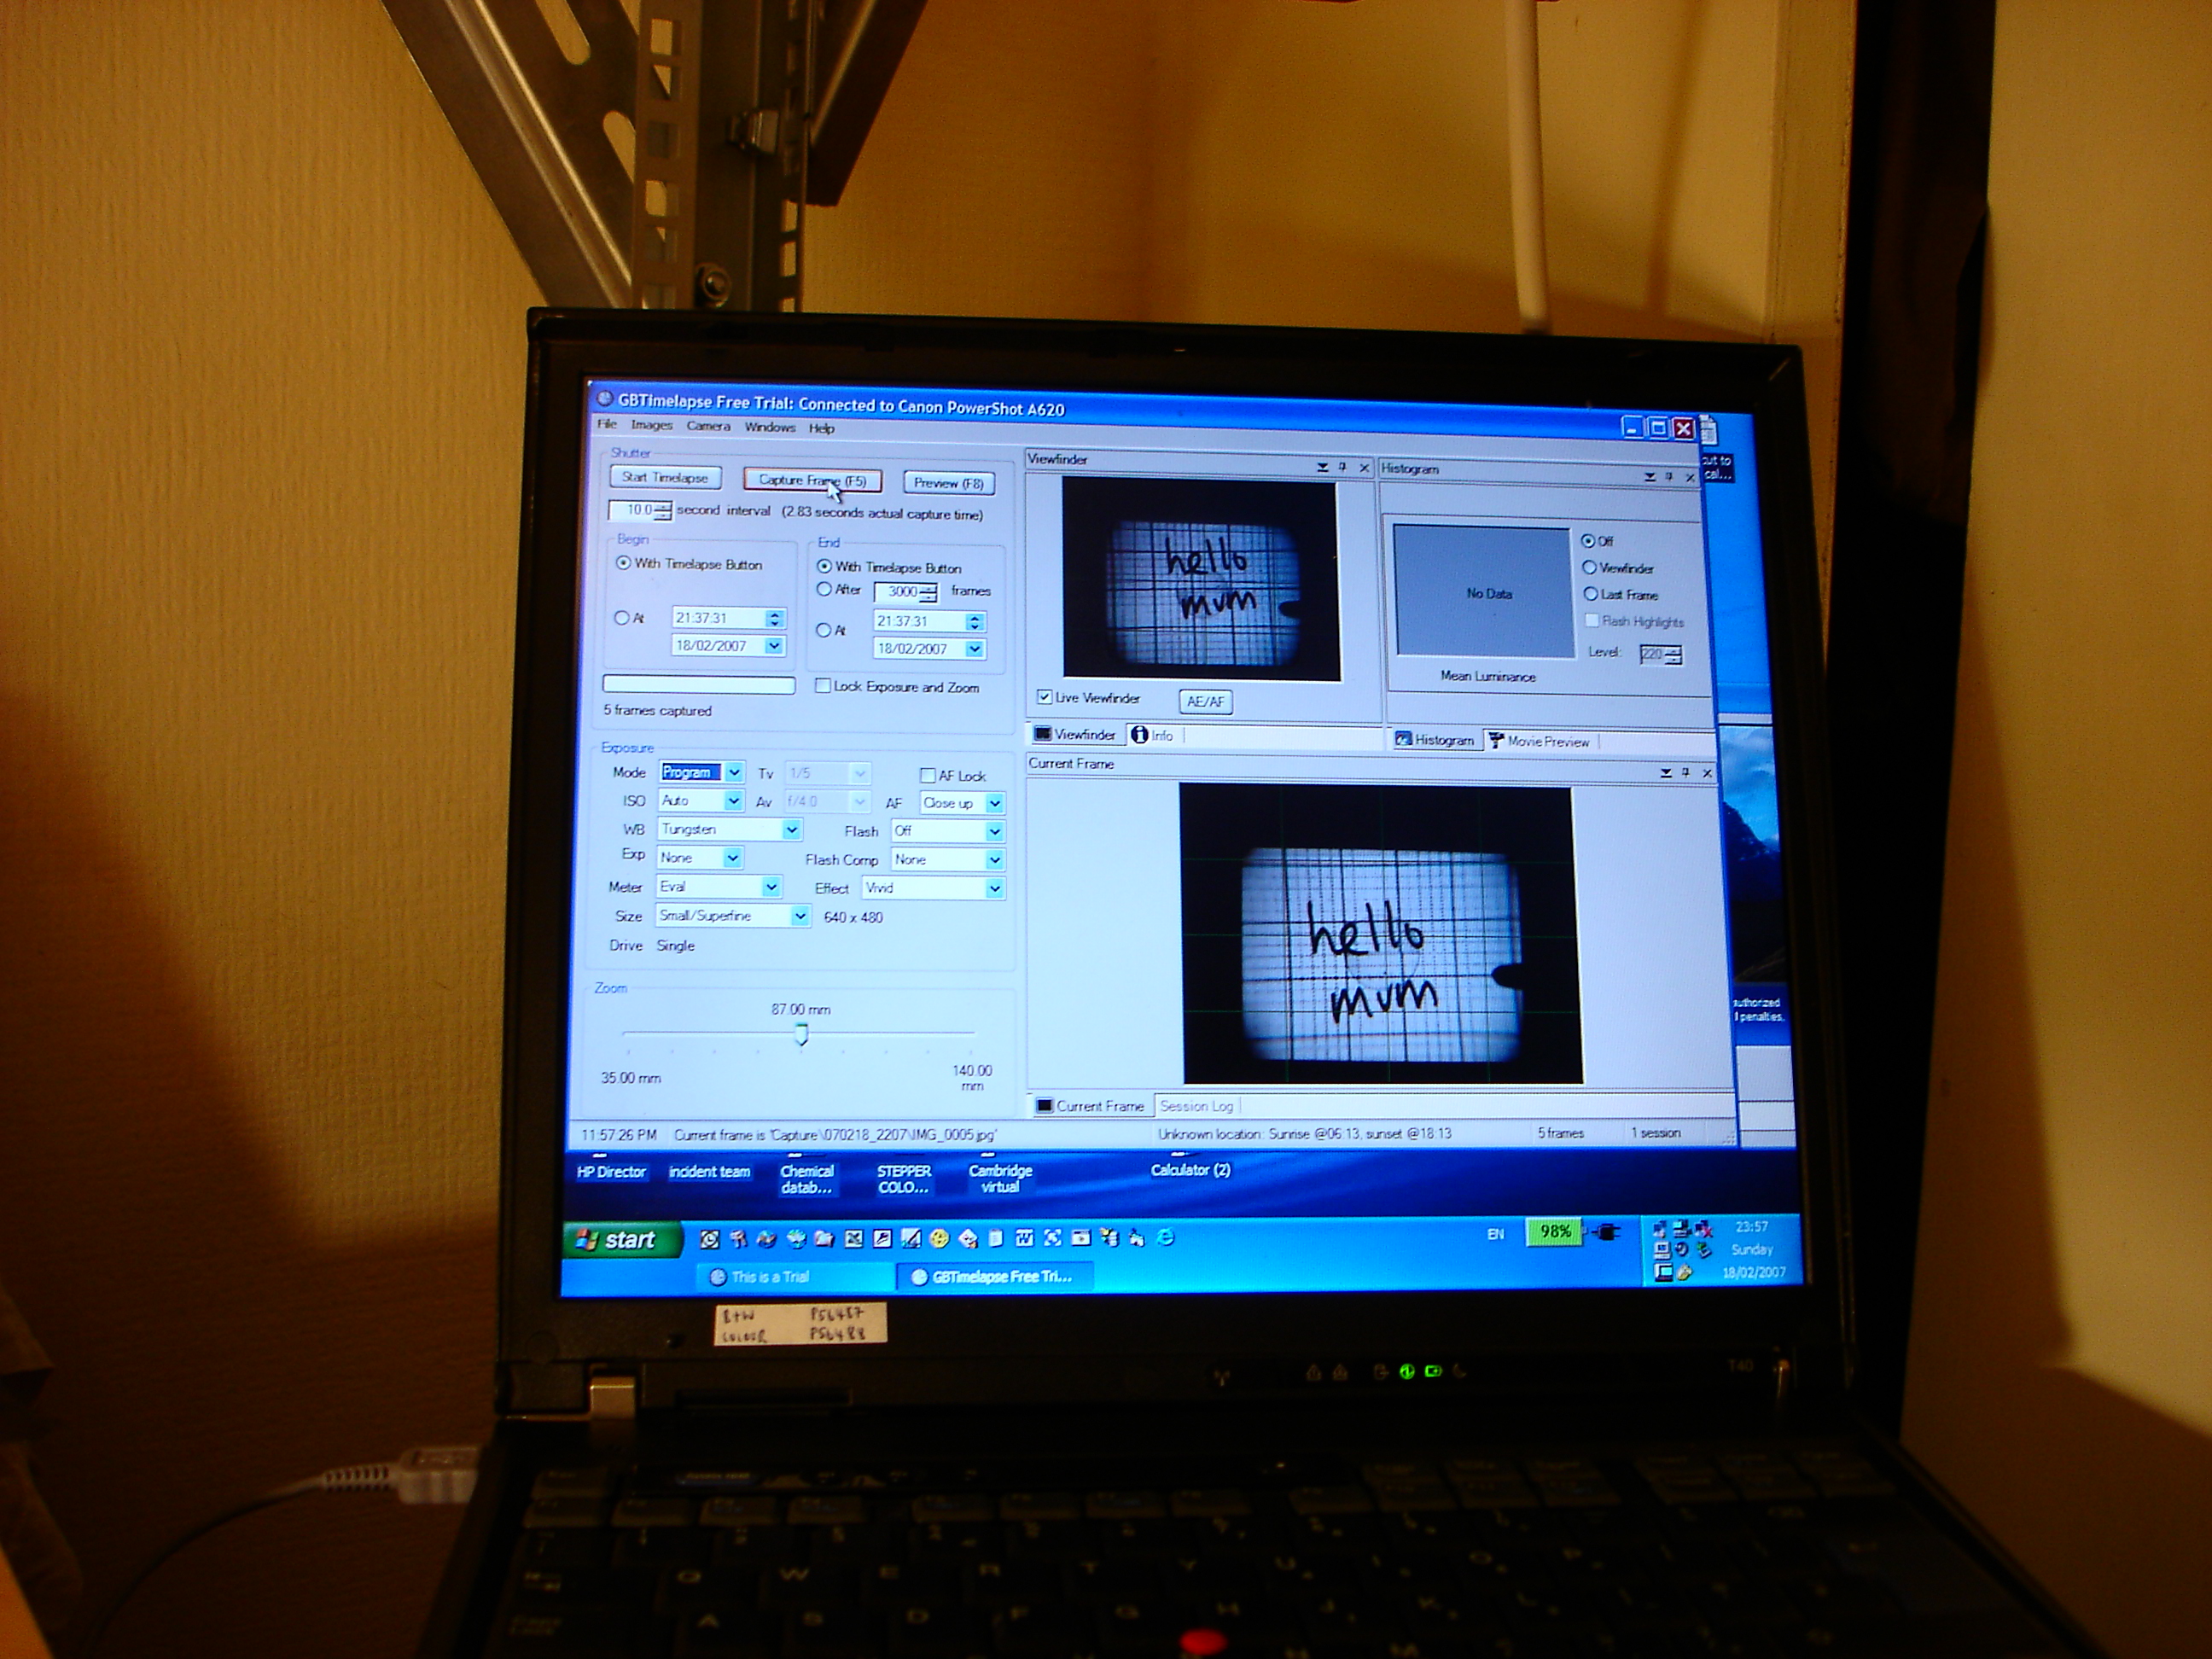
A digital camera attached to the Bauer’s viewfinder seemed like a good idea. Certain Canon cameras have a feature called remote capture which allows them, with appropriate software, to both monitor and capture shots on a PC. I used a program called GBtimelapse to do this, as it was cheap and also had a useful onion skin feature. This superimposes the last captured image over the current monitor view. This proved invaluable when aligning shots.
To provide a means of co-ordinating both the super8 camera, the digital camera and the movement of the rig, a simple electronic circuit was set up. This would response to a shutter button, fire the super8 camera, capture a digital image through the viewfinder then move the rig by 1mm.
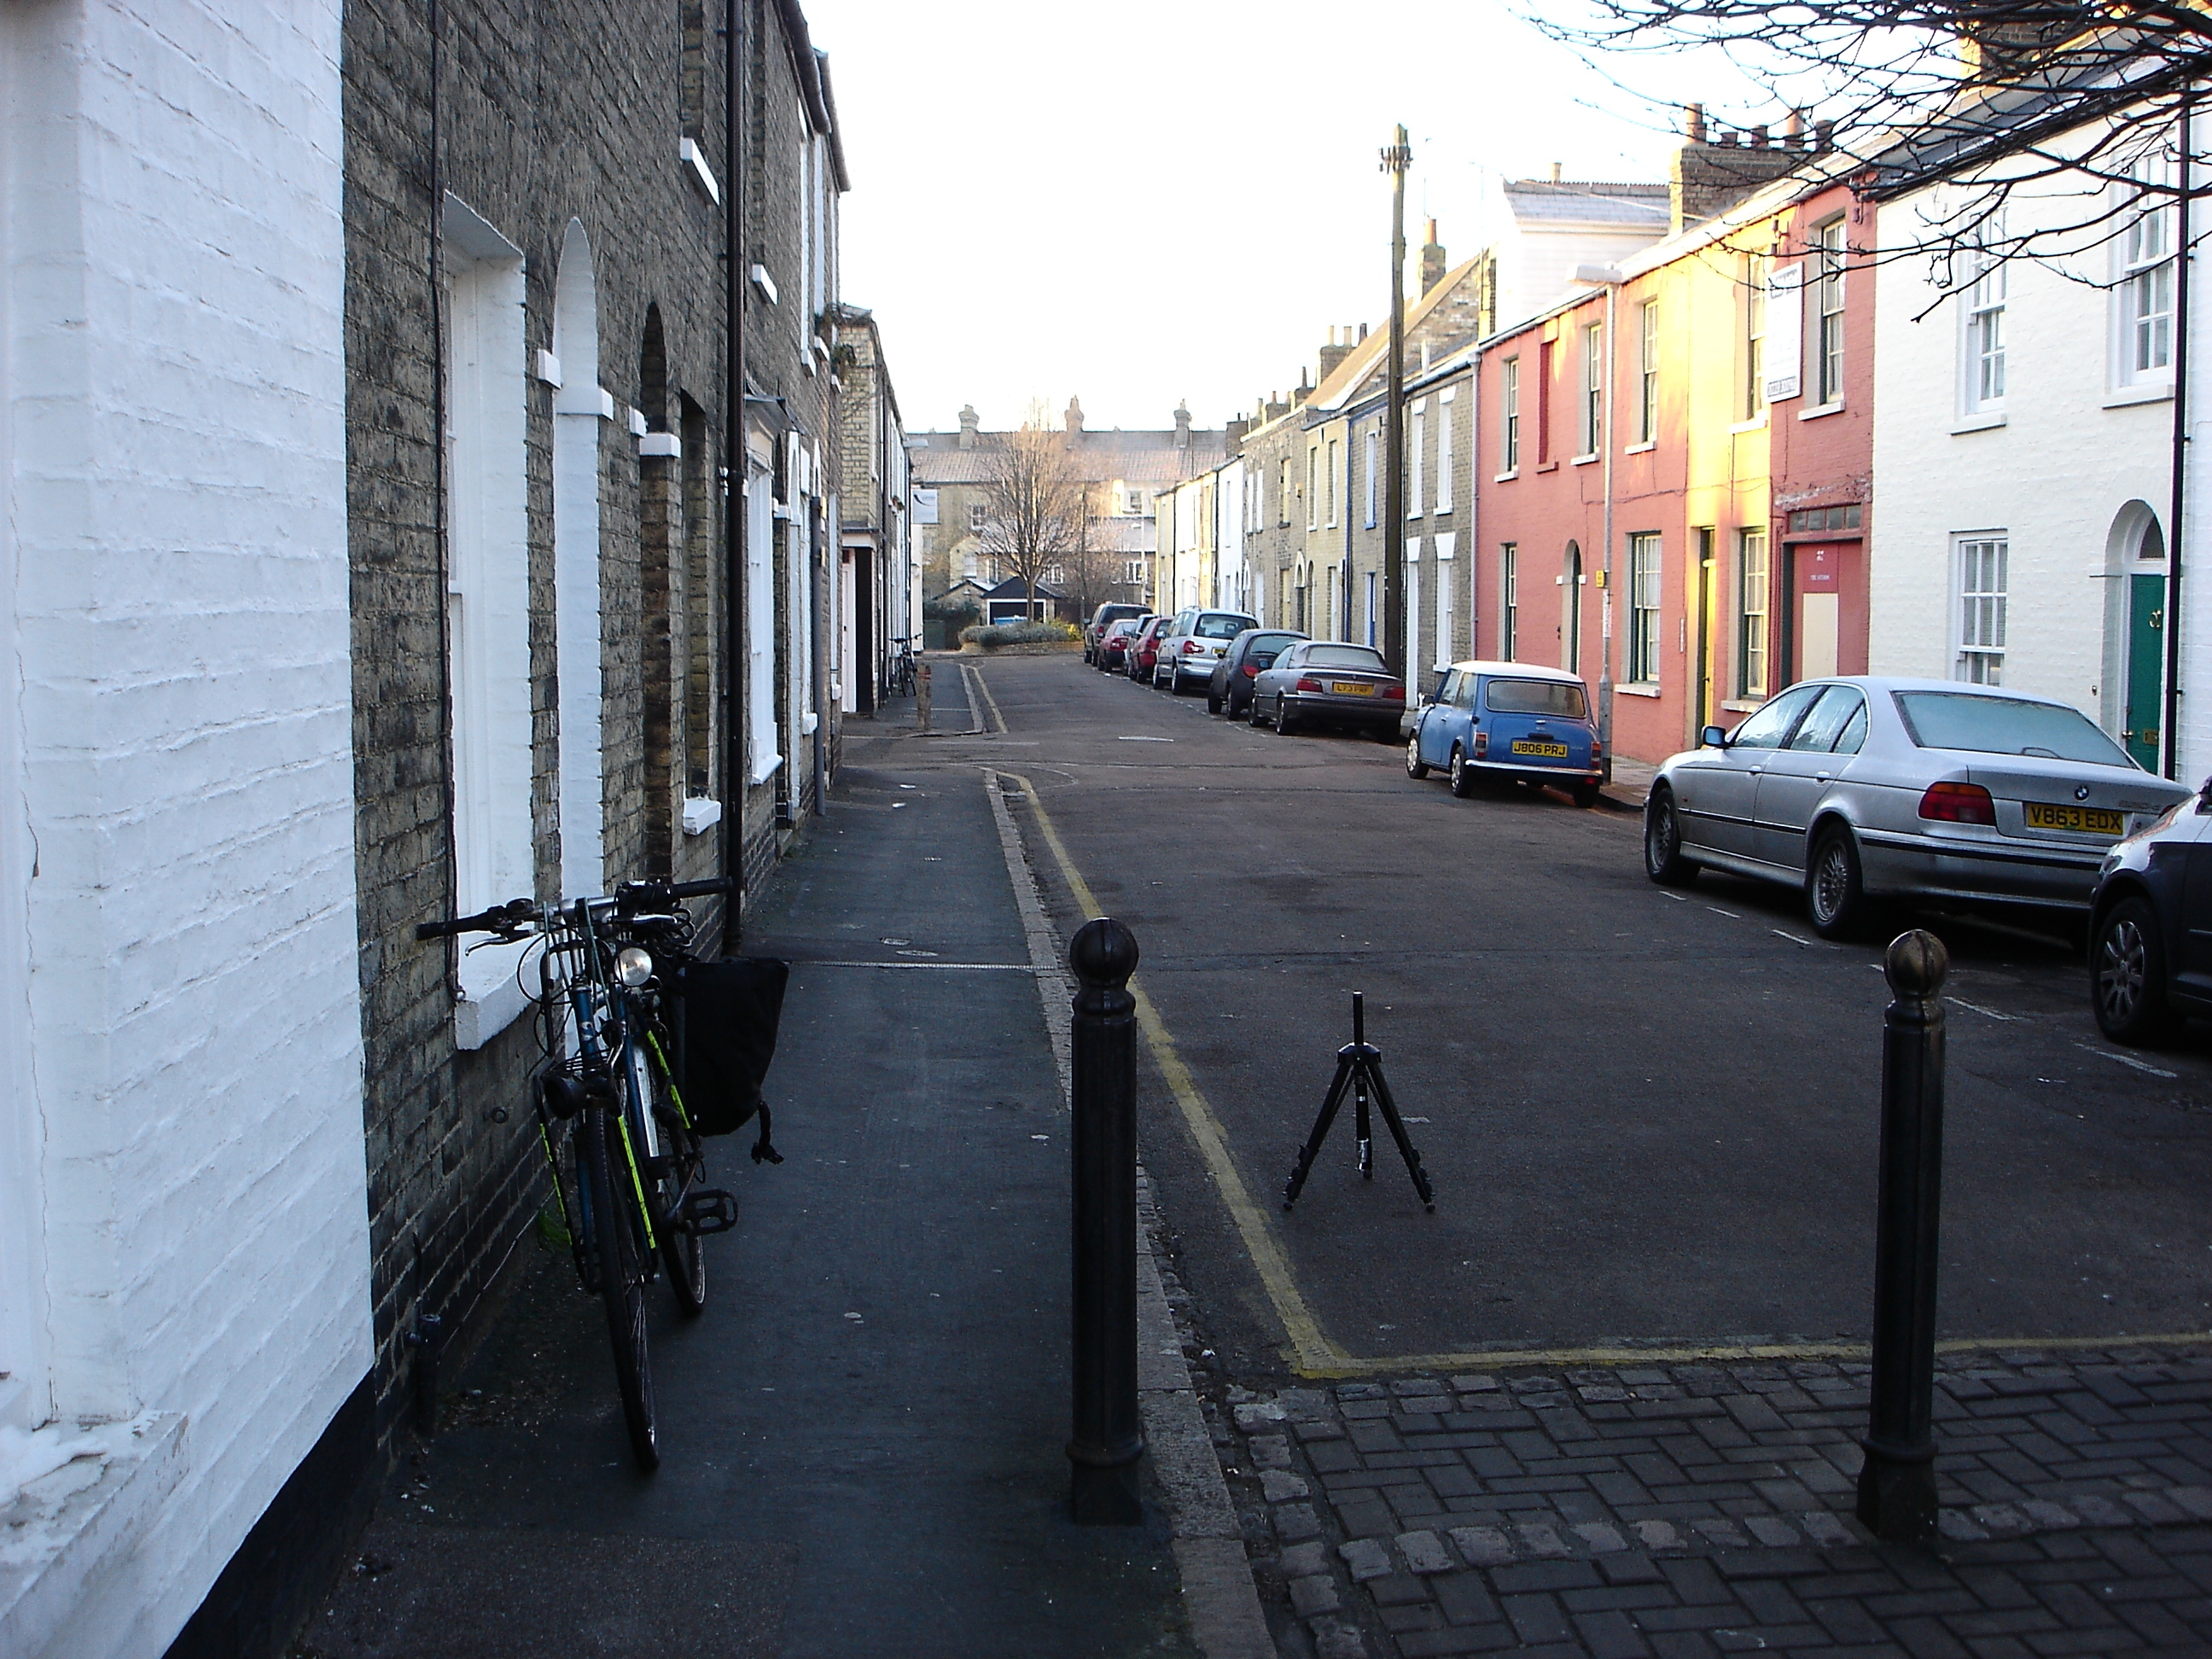
Filming began in January 2007. For the beginning of the film where the camera tilts down from the sky to focus on the cigarette butt, I originally thought that it could be done with stop motion on location. I abandoned that idea after deciding that it would be too difficult to move the camera steadily and change the focus. In the end, the simplest solution was to take several photos of the scene, stitch them together using panoramic software and then film the resulting composite photo using the rig. This gave more control over the image and allowed the end of the shot to be aligned with the subsequent shot.
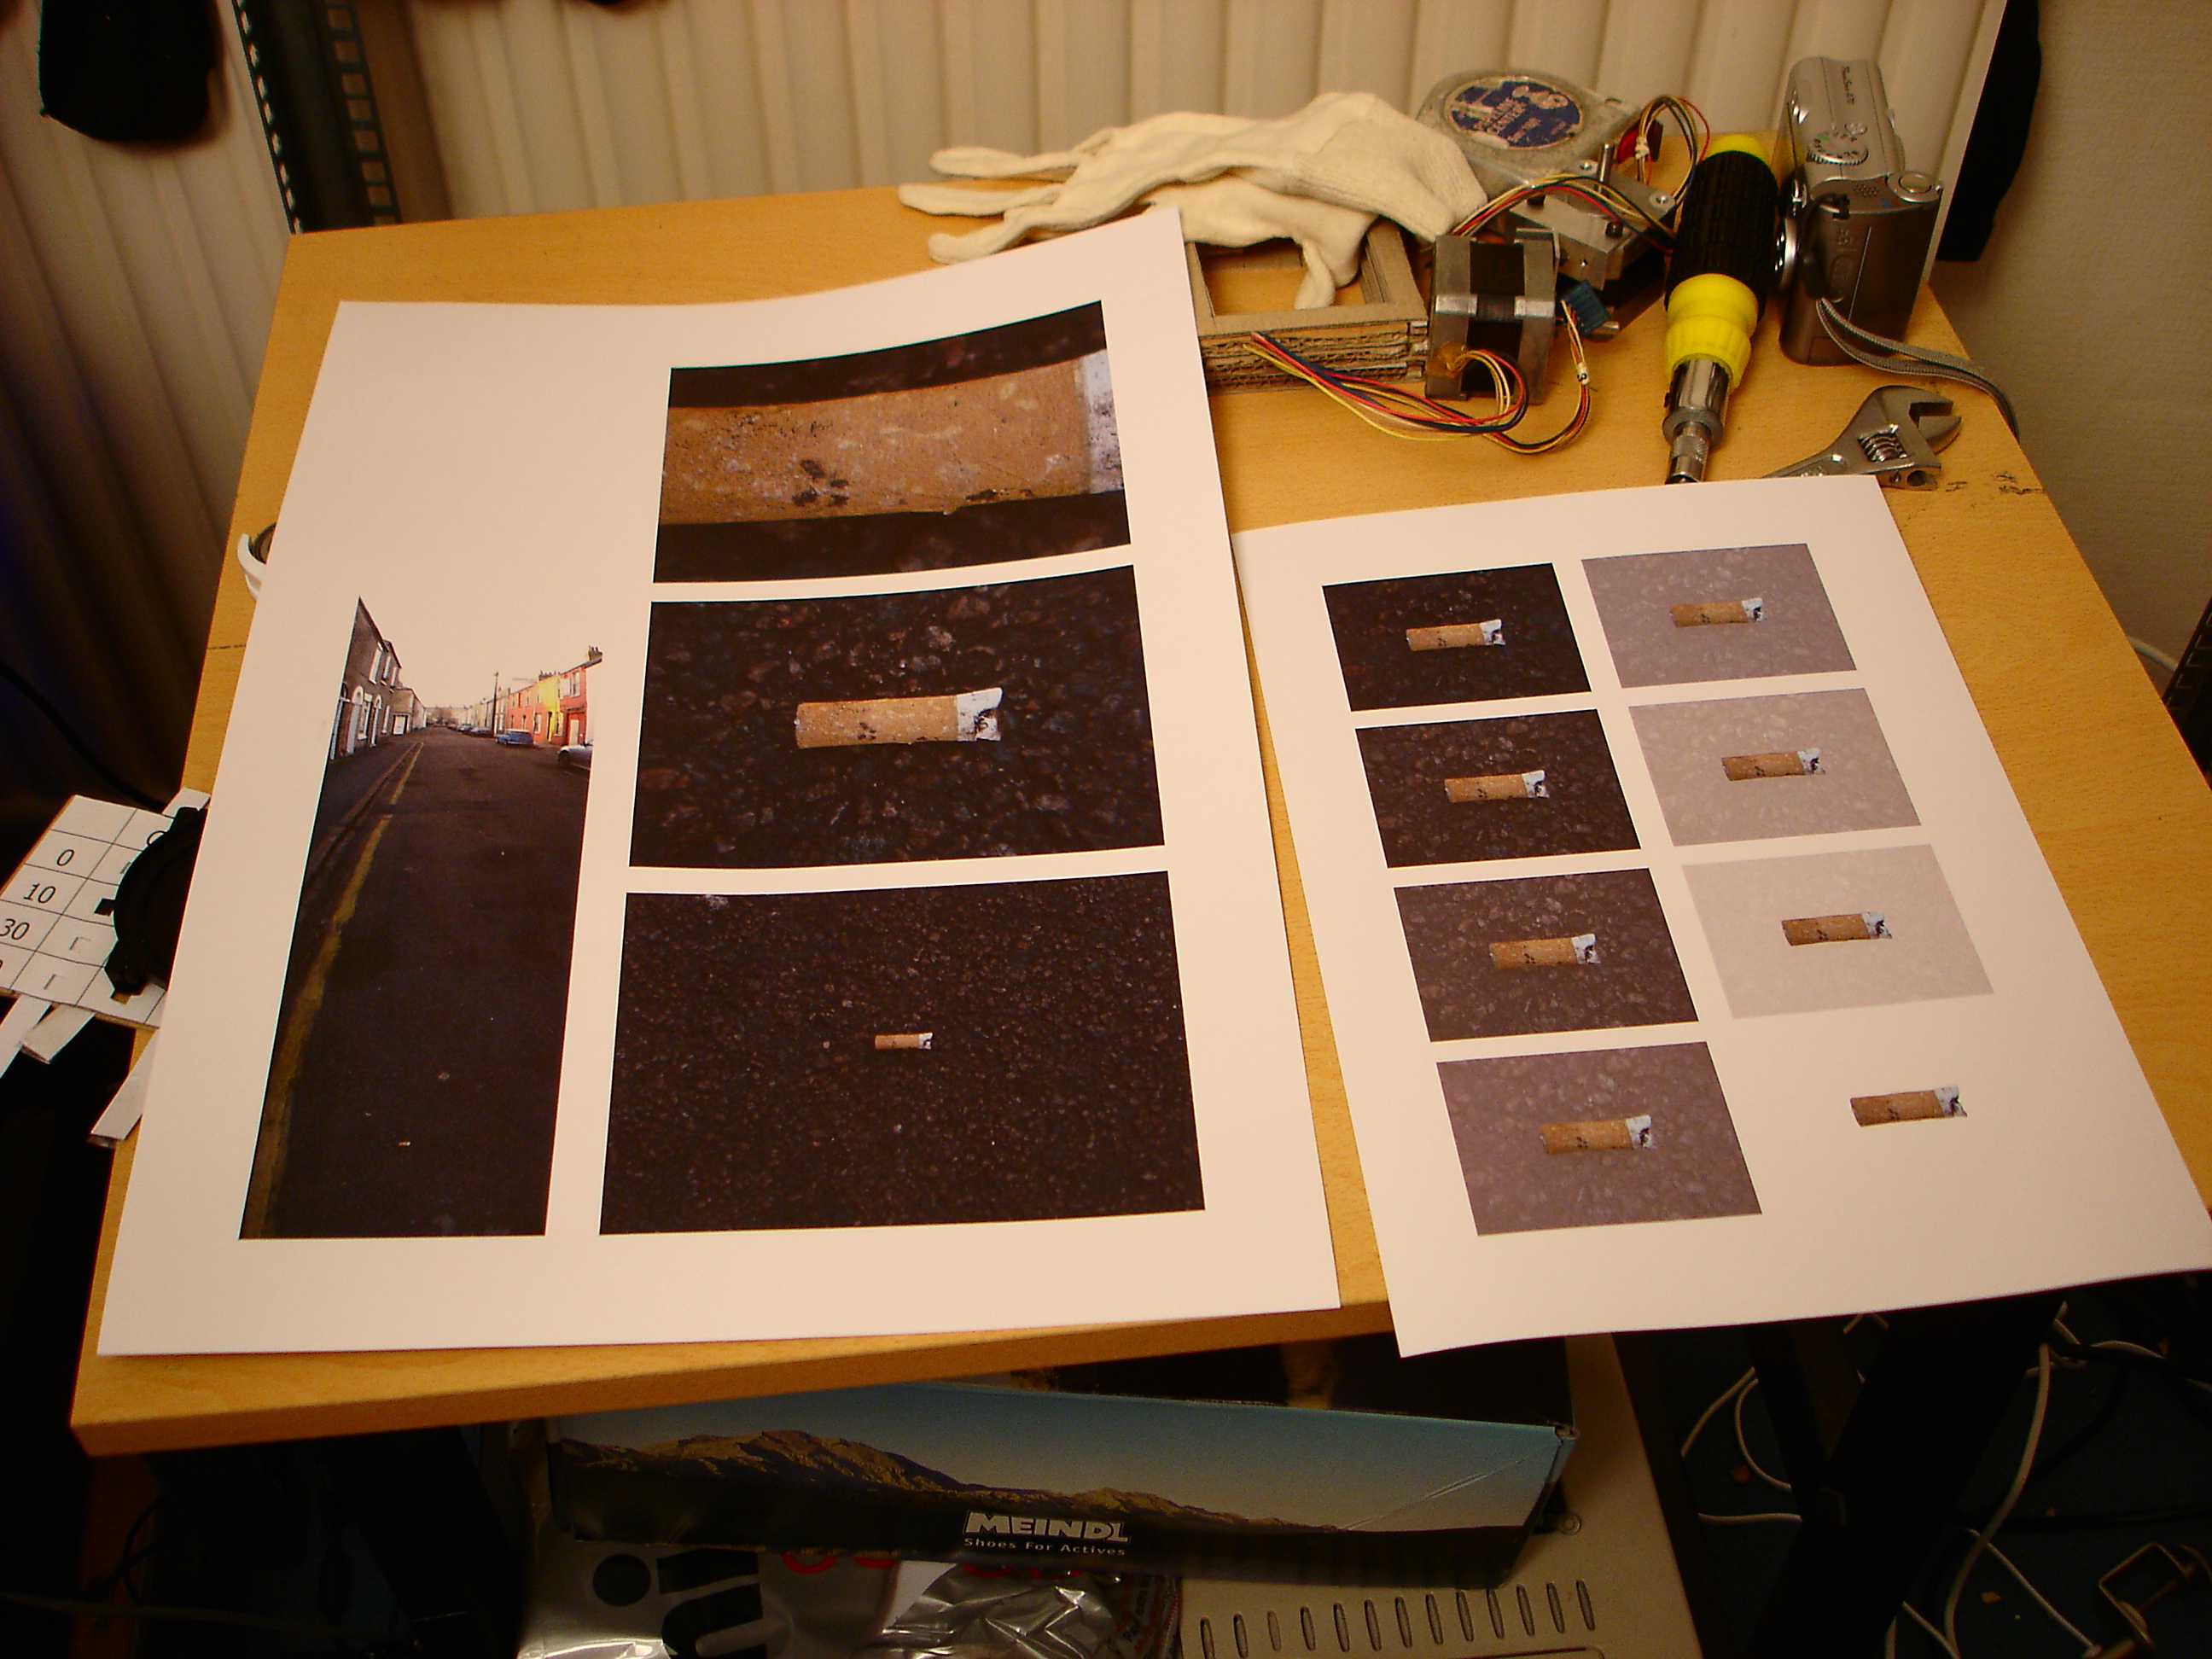
The next shot was a zoom in on the cigarette butt. I knew that I would have a couple extreme zooms in the film and wondered how to do this. As a kid, I had been blown away by “Powers of 10” – The 1977 Charles and Ray Eames classic – and I remember seeing somewhere how they had achieved their astounding zoom sequences. They had printed large photographs of the scene at various magnifications then zoomed in on each photo. Once the magnified image correlated with the full scale of the next photo, the next photo was substituted and the zoom continued. This was the way to go, and so various photos were taken of the cigarette butt as various magnifications and filmed as above. Because of the zooming involved, this precluded the use of the macro lens. In its place a +4 close up lens was used, reducing the minimum focal distance from 1.5m to 37.5cm. This was a manageable distance from the drawing board to the camera and great care was taken to ensure that the rig was level and that the camera distance was as close to 37.5cm as possible. This seemed to work well, but I forgot to lock off the digital camera’s exposure when I took the original photos so the exposure does change slightly.
To achieve the effect where the cigarette becomes isolated from the background, I used photoshop to separate the cigarette from the background and to produce a dozen intermediate images in which the background fades to white. Again the video assist / software were crucial to make sure the images in the transition were aligned as closely as possible.
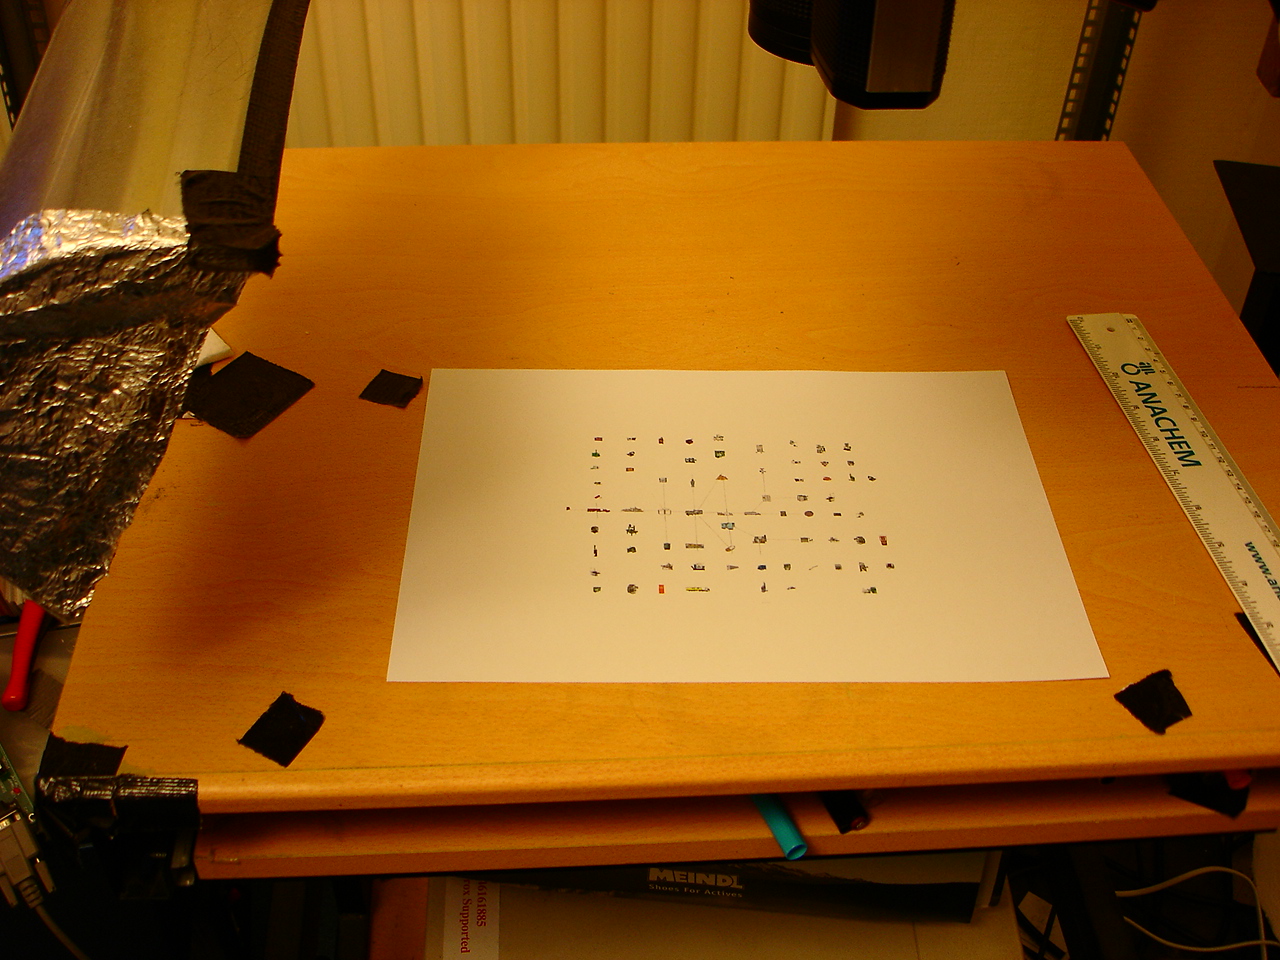

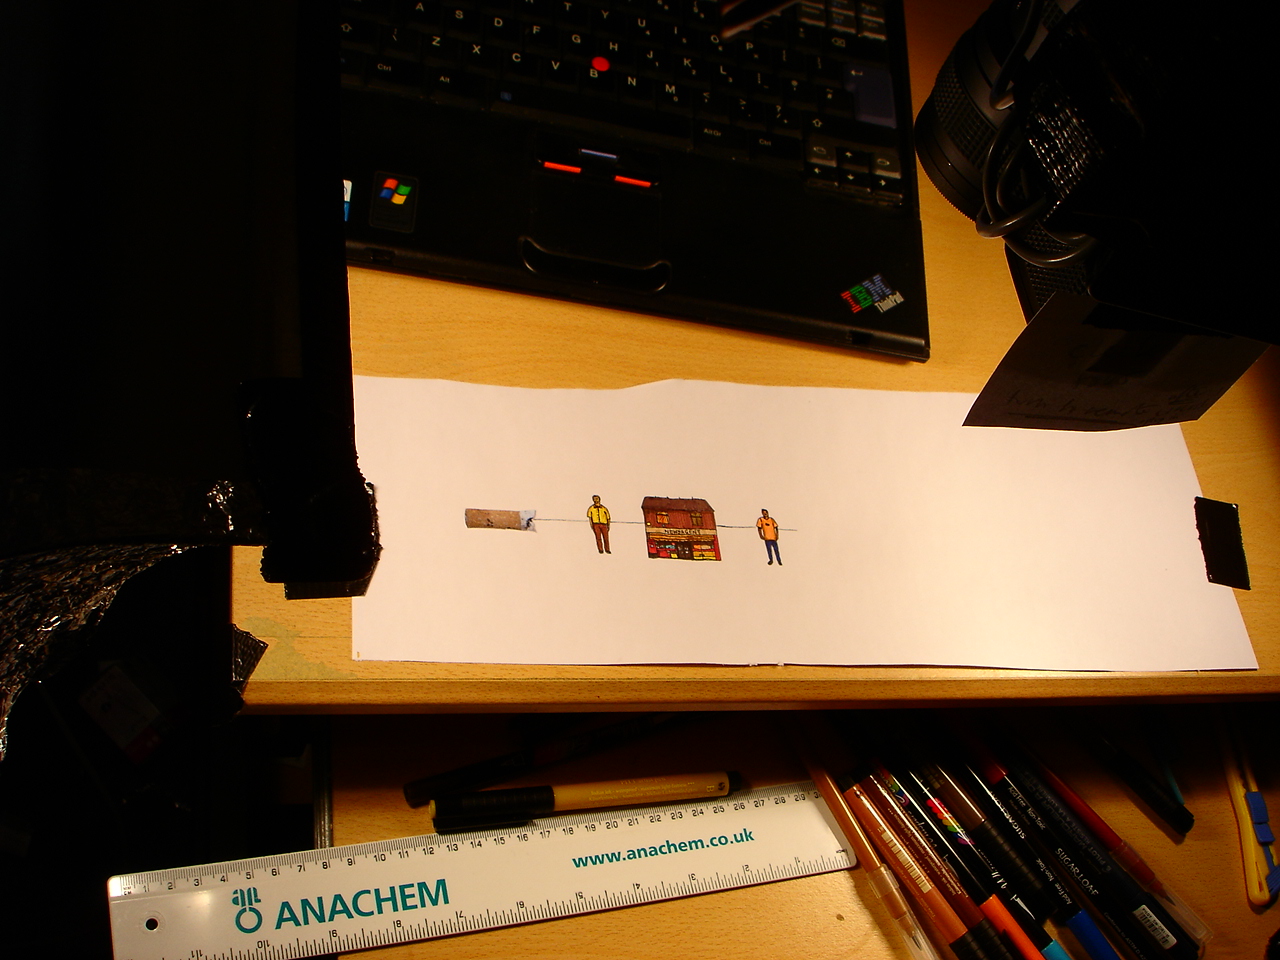
Next came the main bulk of the animation. Each image was approximately 3 x 2 cm, primarily to save time and space. Images where drawn in ink and coloured in using felt pen and coloured pencils. One limit of the rig was that with the new improved lighting setup, it could only move about 20 cm before the lamps hit the rig. Therefore after 20cm, I had to move the camera back. Instead of drawing onto a long roll of paper, I just used A4 sheets and so after 20cm I had run out of paper too. So the solution was to carefully cut out the last image with a scalpel and then paste it onto a fresh sheet of paper and carry on from there. Once again this would not have worked without the video assist setup. The images were drawn after work and at weekends for a couple of months. I thought it would be a real slog, but it turned out to be strangely therapeutic. The average was probably two or three drawings every evening.
The long zoom out at the end took quite a lot of work to get right. The camera zooms out to reveal an infinite number of objects / machines/ resources that had a part in the story of the cigarette butt. To achieve this I had to rely on the power of photoshop once more. After I had zoomed out to the widest shot for on image, I would scan this image into the computer. This would then be resized to 50% in photoshop and combined with other resized scans of the previous images to produce a composite image. I had a folder with hundreds of other random images and these were also added to the composite to extend the scene. This was then printed off, filmed as before and embellished with some extra animated pieces for interest. This image was then scanned into the computer again, resized as before and extra elements added in photoshop, printed off and filmed. As the zoom reaches its widest point, each object is tiny and this was produced with photoshop by cutting, rotating and pasting the same section to provide an infinite sea of images. This infinite blur of objects gives way to the structure of the cigarette butt and then switches to an extreme close up of the butt shot using a Sony DSC-12 coupled with a x10 magnifying glass. The zoom then continues until we’re back where we started looking at the butt lying in the street. The credit at the very end was simply printed off the PC then covered up with black paper which was gradually cut up to reveal the white beneath.
You can’t imagine the relief after seeing the “Exposed” mark on the film. I’m not sure what I would have done if the film had jammed after doing all that work. Had a stiff drink for a start! This project was a great leap into the unknown but it has encouraged rather than deterred me. I’m currently working on the next film based on a computer controlled kinetic sculpture.