Fixing the Elmo GS1200’s fatal flaw
A Simple Modification
Photos: Ugo Grassi
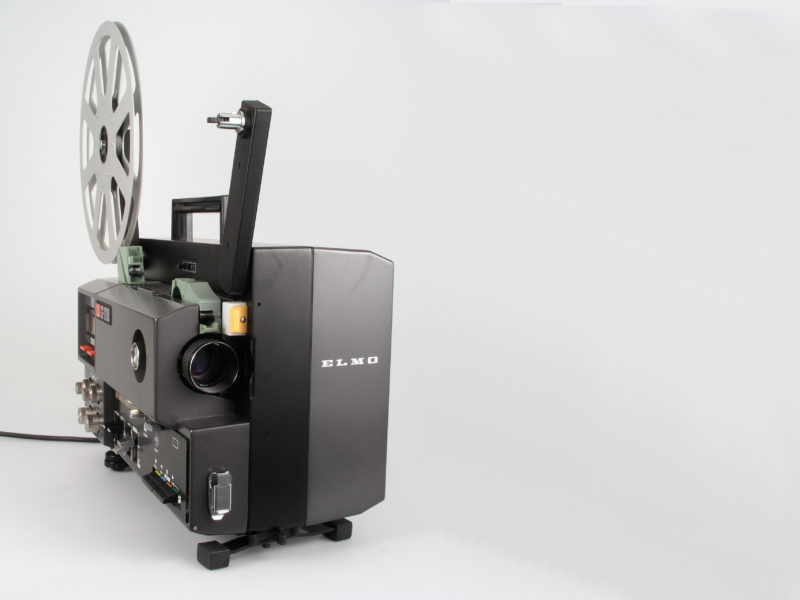
The Elmo GS1200 has rightfully earned a reputation as the Rolls Royce of Super 8 projectors. It features stereo sound along with a bright and sharp image. Because of its popularity, many accessories are still available and these machines are highly sought after by Super 8 projectionists. Unfortunately, there is a design flaw in the first series of these projectors that can lead to serious audio problems. Here is an overview of the defect, along with step-by-step instructions to permanently repair it.
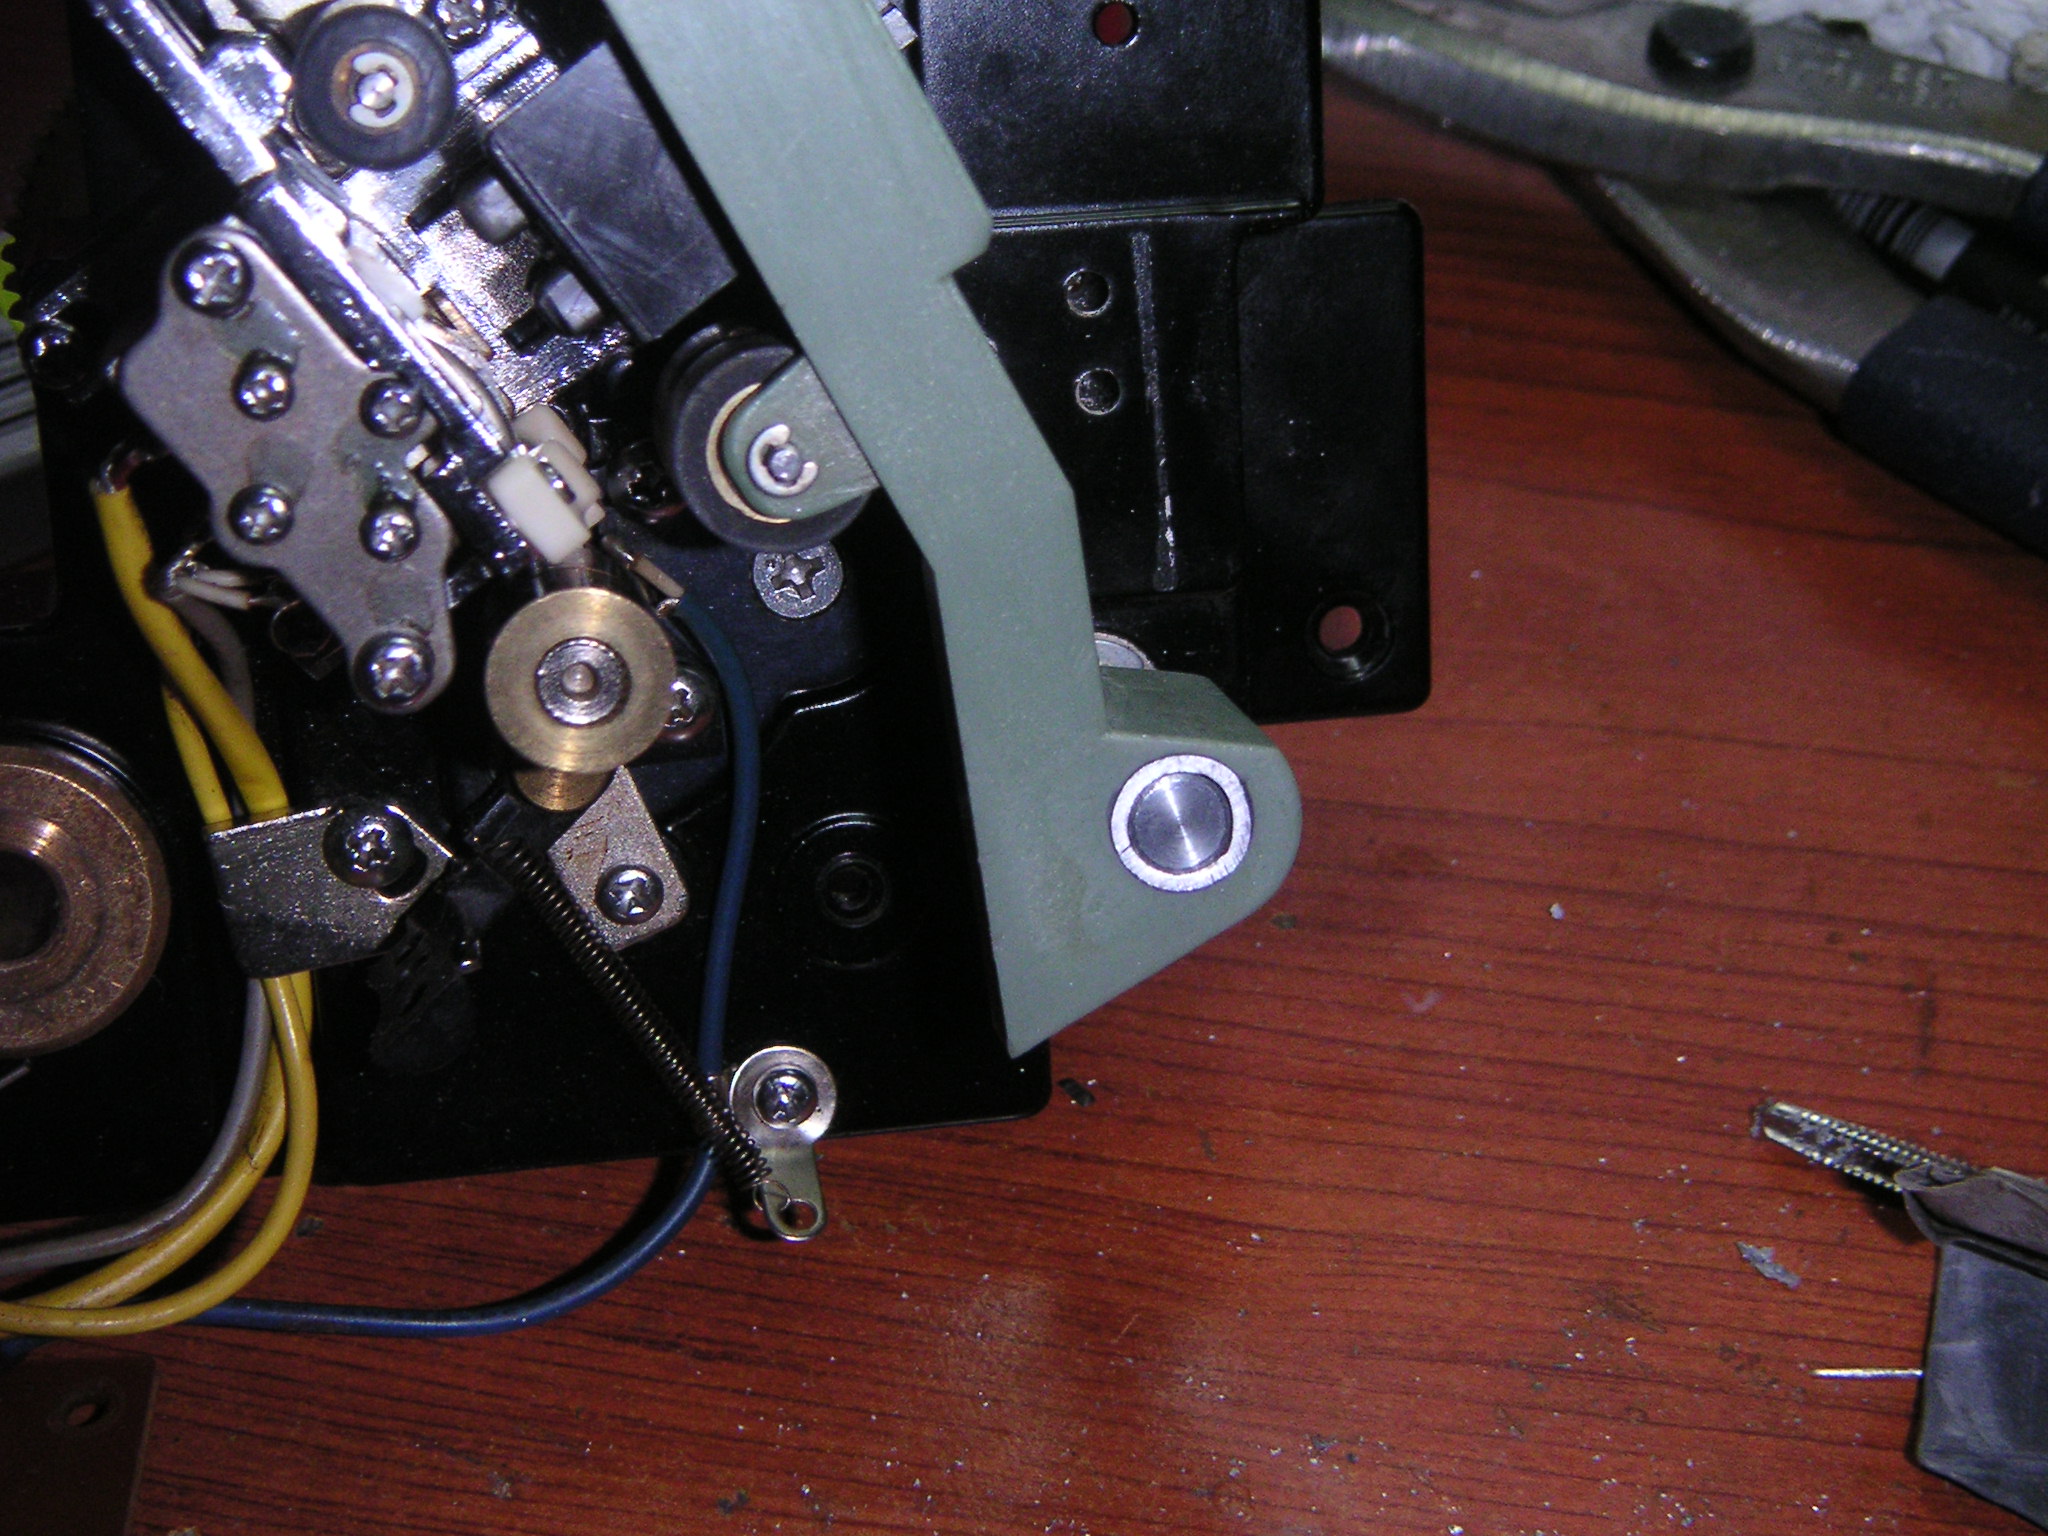
Many GS1200 owners have experienced the shock of projecting one of their favorite films and hearing a bad audio flutter. After a moment or two of initial panic, they discover that the problem sorts itself out when they press down on the green pinchroller lever that presses the film against the magnetic sound playback heads.
The lever is designed to exert between 250 – 300 g of force to hold the film against the heads. In the first version of this lever, the metal shaft is affixed directly into the plastic. After years under pressure, the plastic often cracks. This causes a lack of pressure against the playback heads, leading to serious sound playback problems. If left unattended, the plastic around the shaft will disintegrate completely.
If your projector has a pinchroller lever without a sleeve around the metal shaft, it would be wise to check it for cracks immediately. Many users have resorted to the use of Superglue (Cyanoacrylate) to hold the cracked part together. As long as it is not left too long, the damage can be adequately repaired using this technique.
Elmo eventually recognized the flaw and redesigned the pinchroller lever to incorporate a sleeve that fits around the shaft. This redesign reduces the stress on the thin plastic and greatly reduces the risk of cracking. However, many of the original sleeveless pinchroller levers are still in use. The danger, of course, is that replacement parts are almost impossible to find and it would be a shame to lose the use of a GS1200 because of such a simple mechanical failure.
Luckily, there is another option for owners of the early series of GS1200 projectors: It is possible to craft and install a metal sleeve around the shaft to reduce the likelihood of cracking in the future. Before proceeding further, confirm that the plastic around the pinchroller shaft mount is absolutely crack-free. If there are cracks, there is a very real possibility that the pinchroller lever could break while performing these modifications.
-
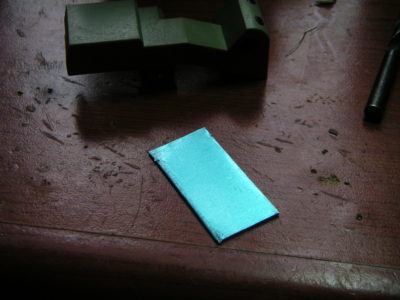
- 1. A small sheet of aluminum will be bent to create the new sleeve.

-
- 2. Form the aluminum sheet around a drill bit, ensuring that the bit is the same size as the original hole in the pinchroller lever.

-
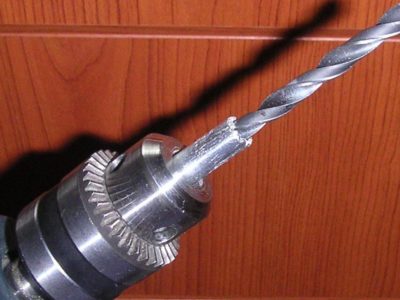
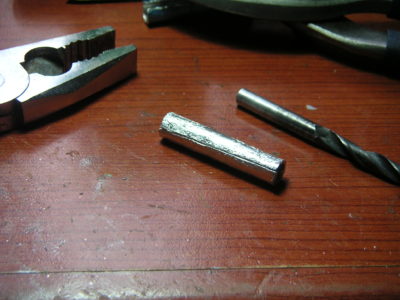
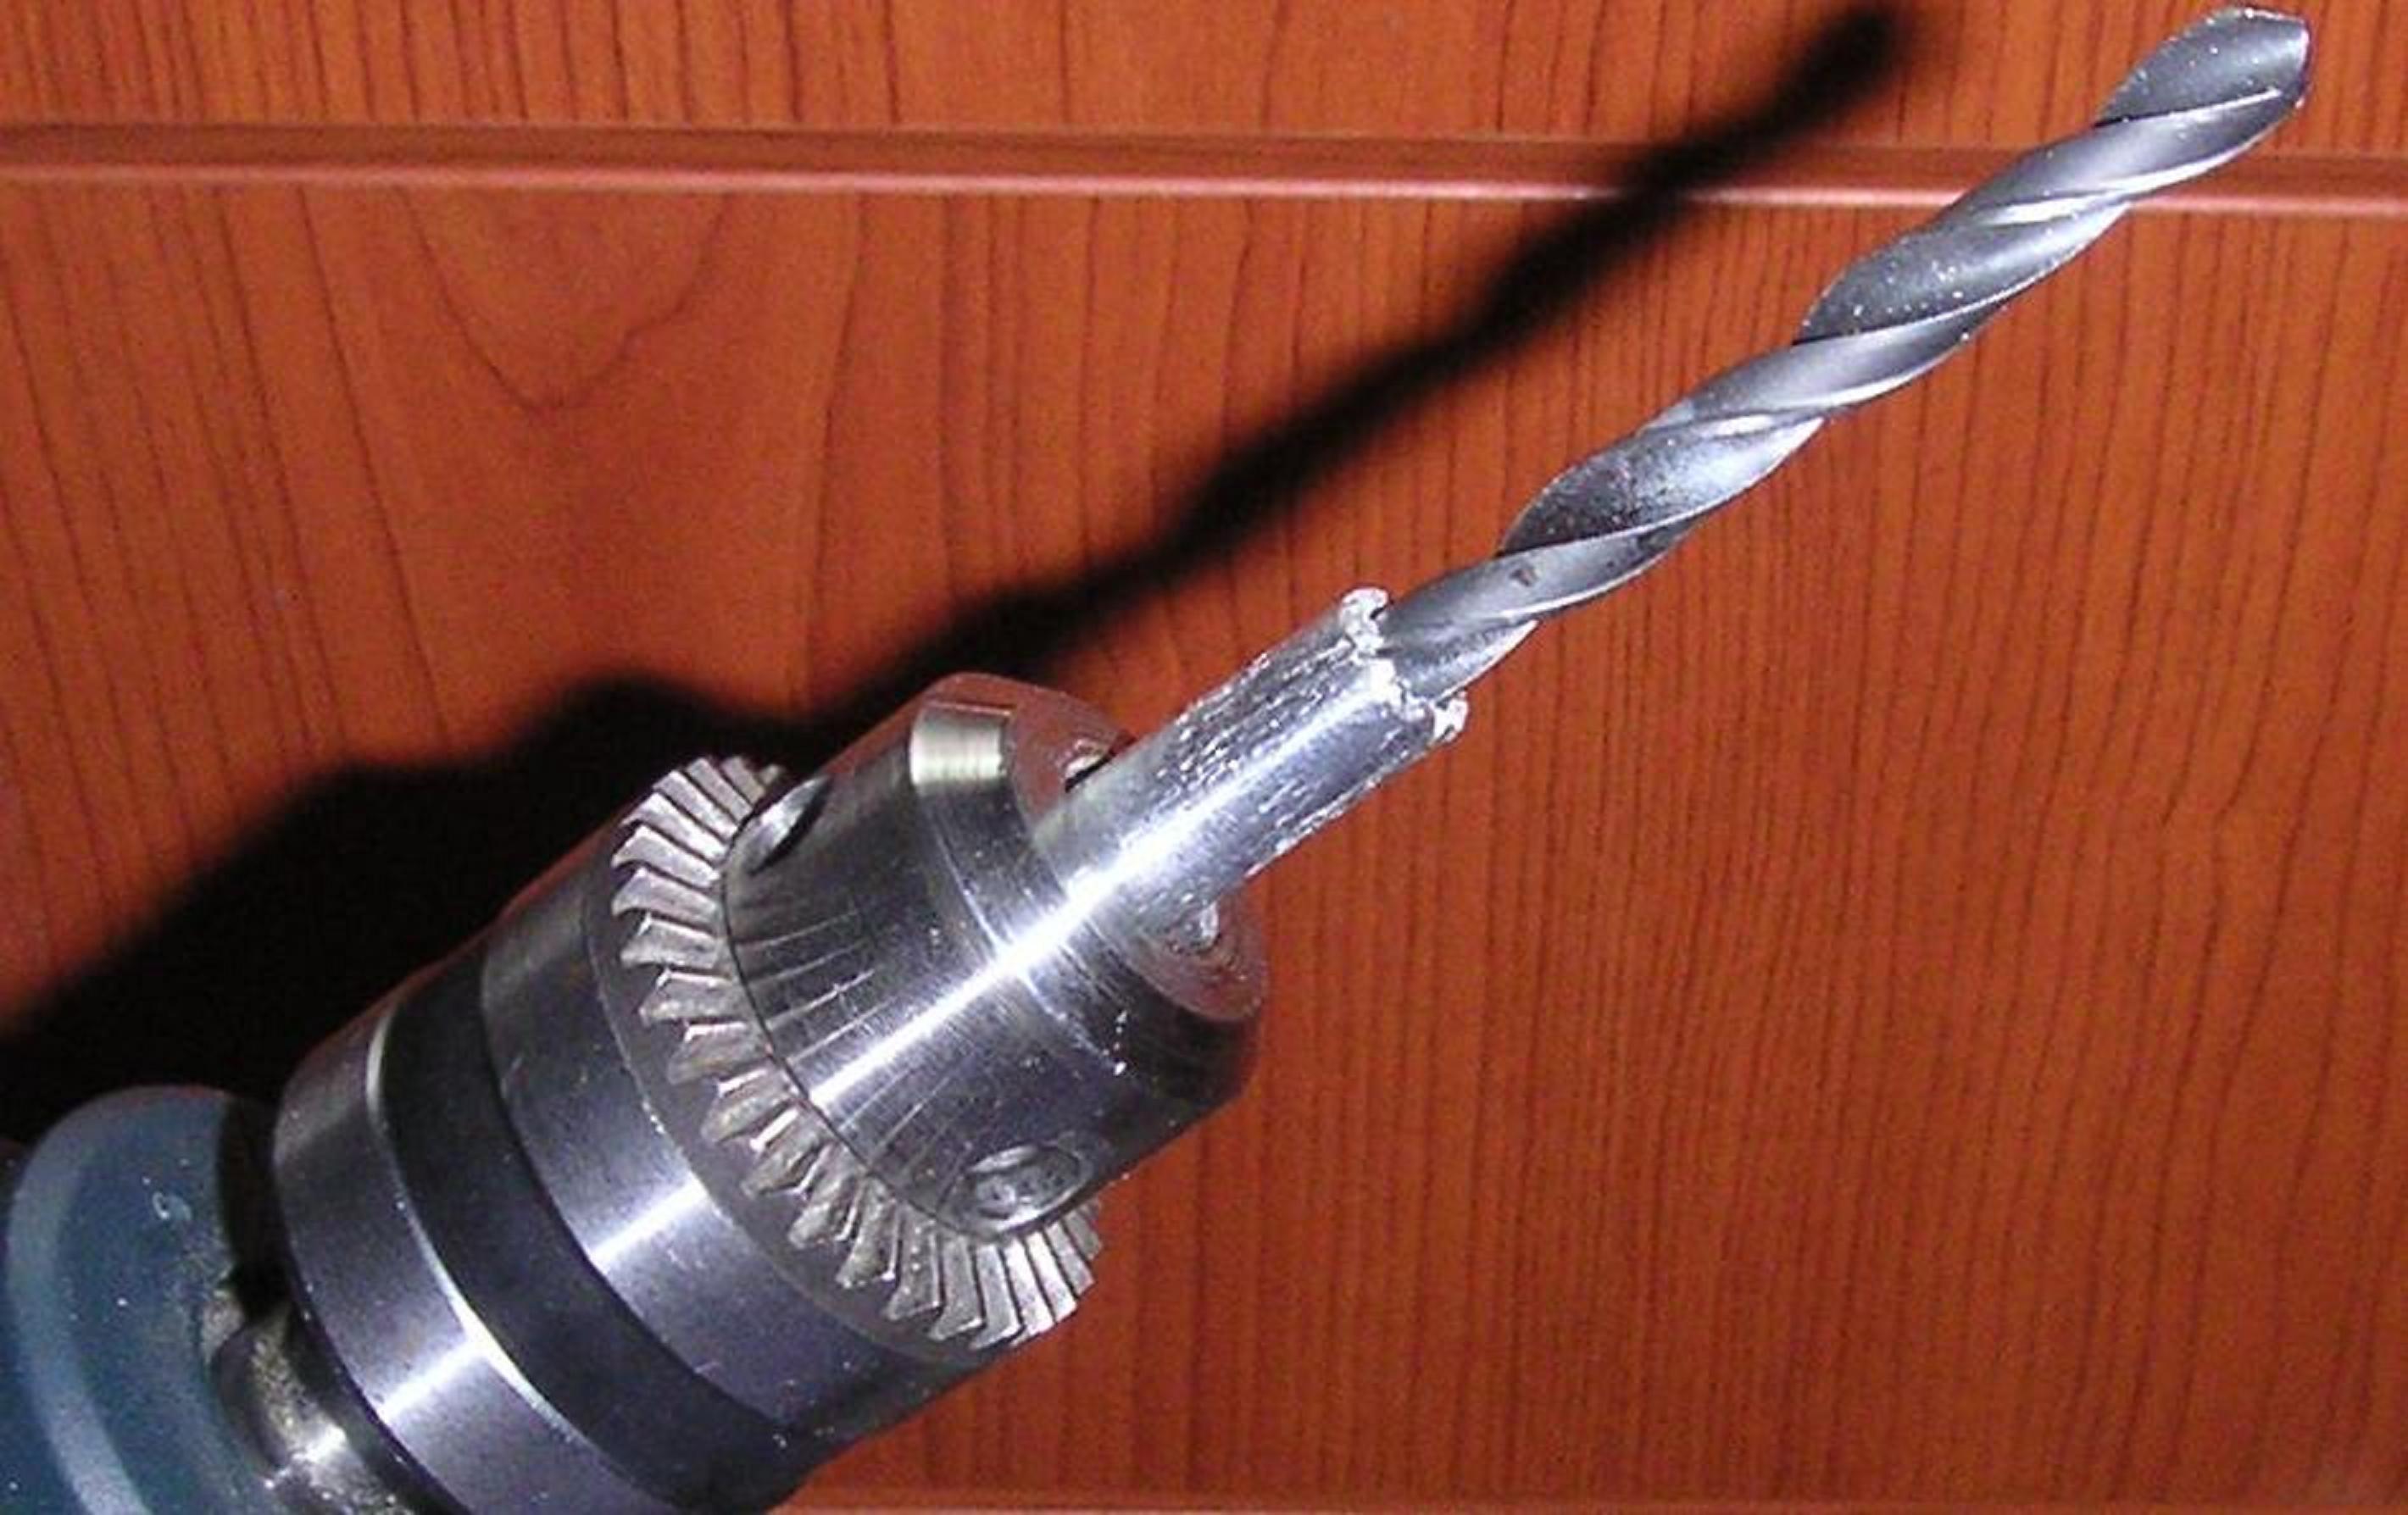
- 3. After notching teeth into one end of the sleeve, fix it firmly in place around the drill bit and use it to enlarge the hole.
-
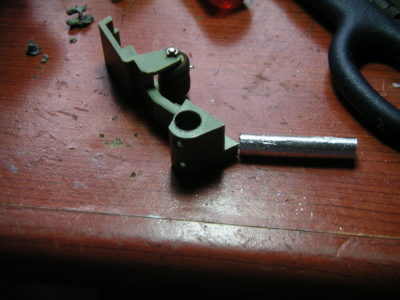
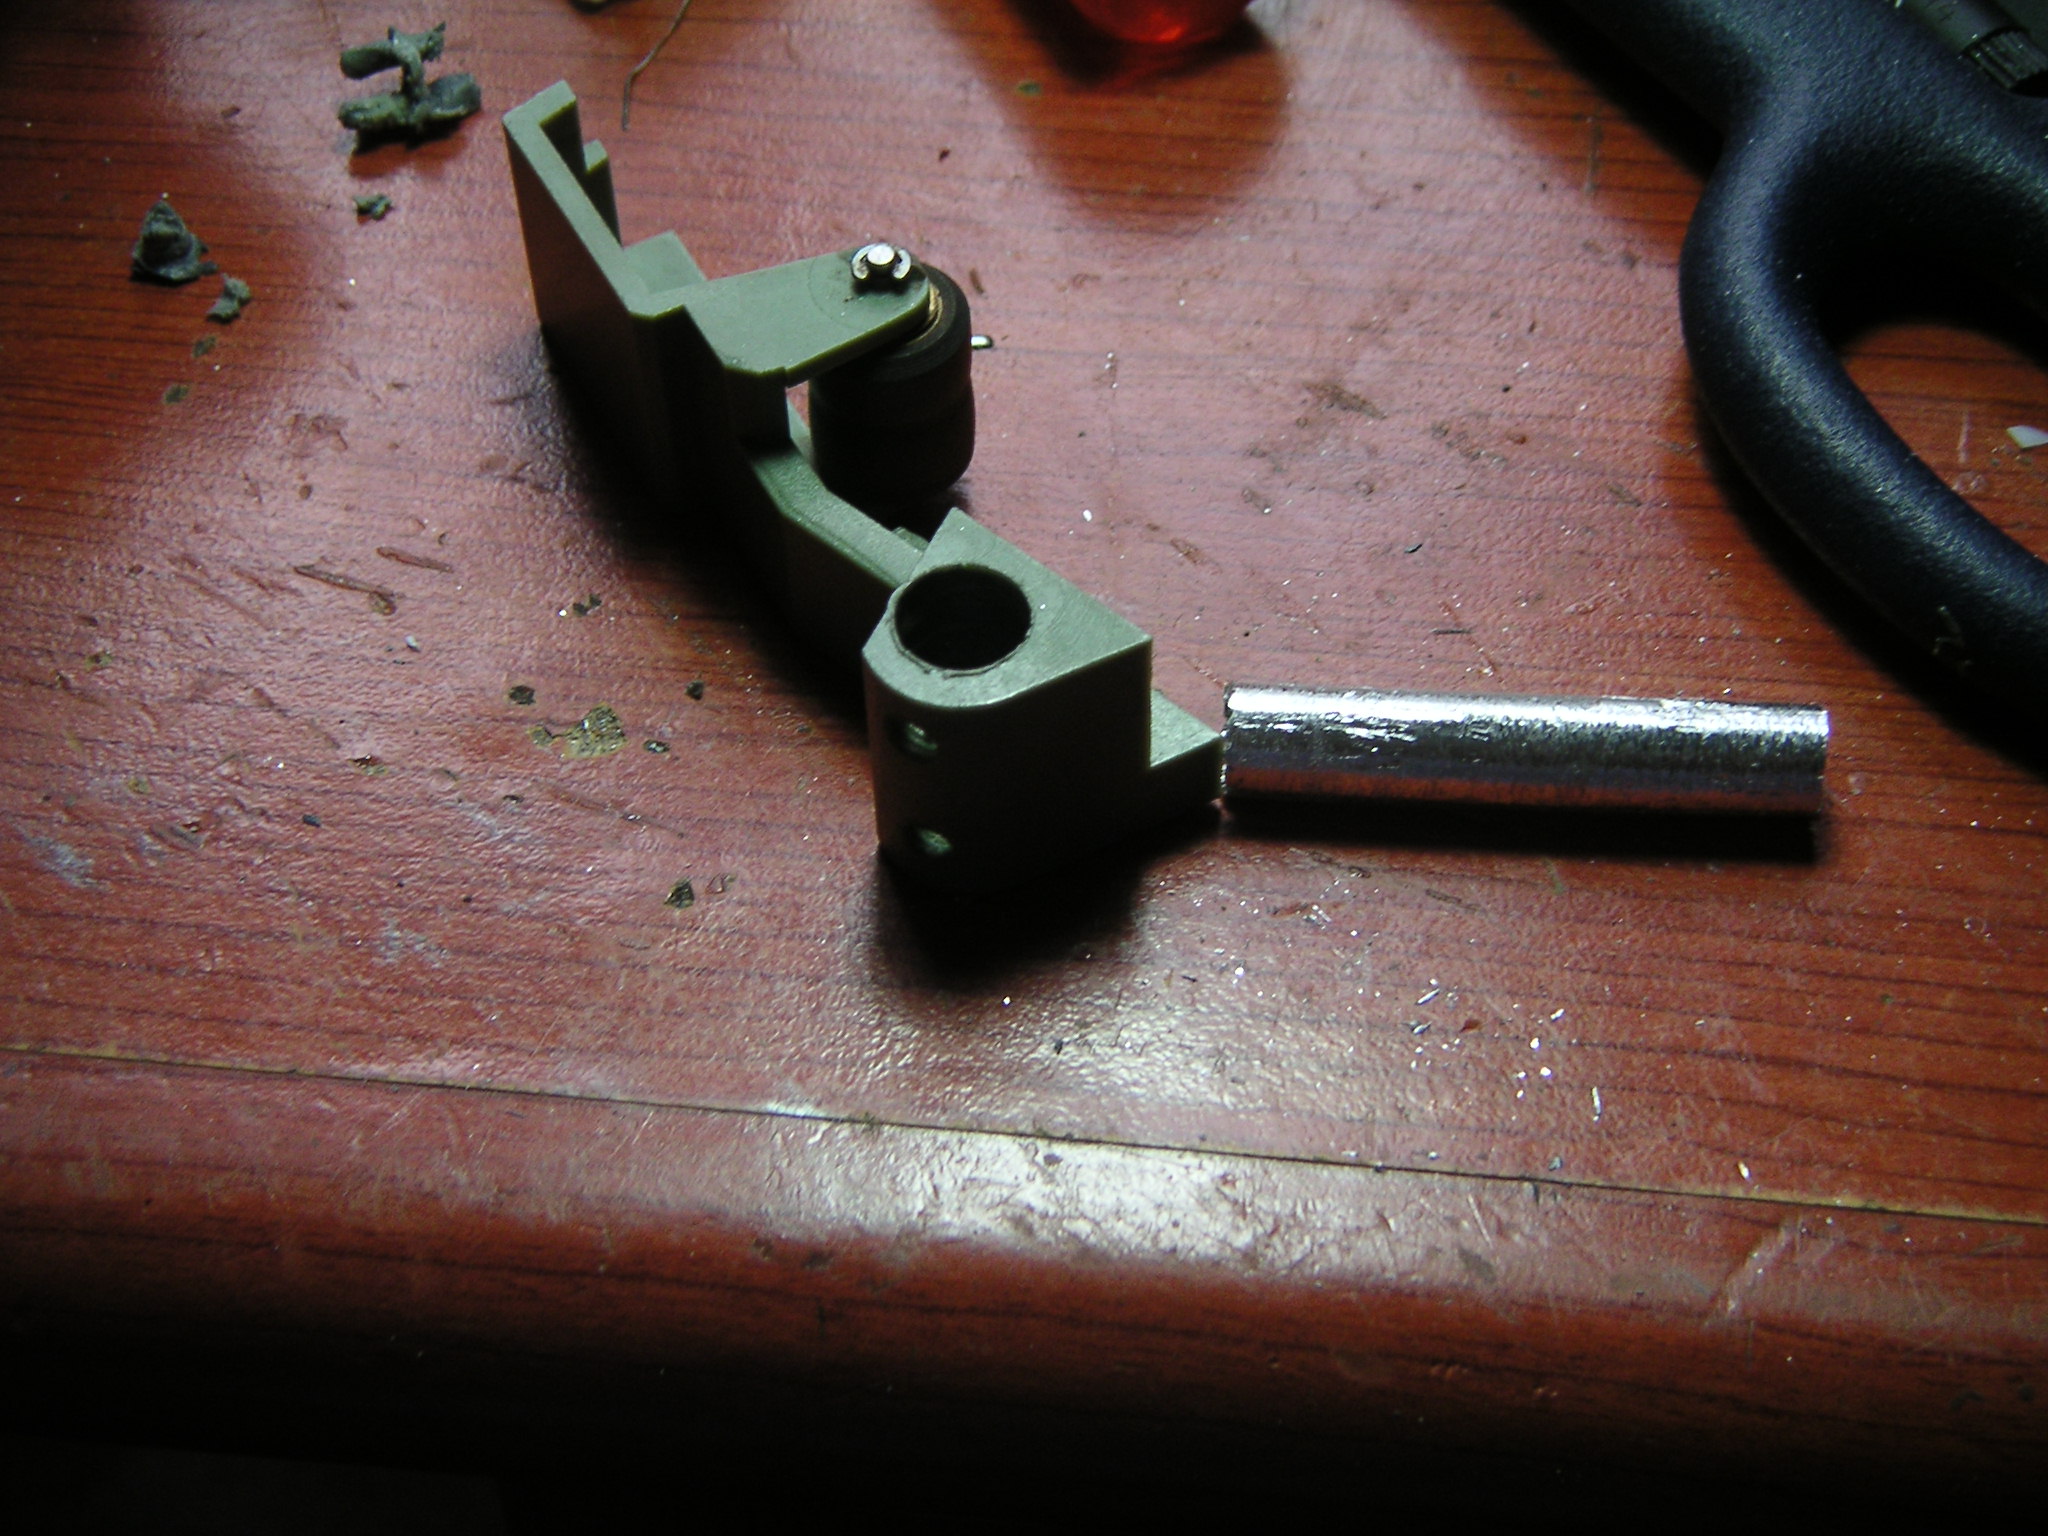
- 4. The modified pinchroller lever, showing the enlarged hole and new metal sleeve alongside.
-
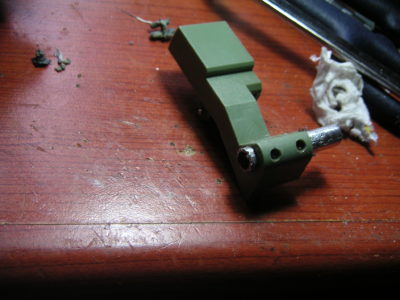
- 5. Drill screw holes into the sleeve to hold the assembly firmly in place over the shaft.

-

- 6. The final result should give years of trouble-free service.
To build and install the metal sleeve, you will need a small sheet of aluminum, a power drill and simple hand tools (screwdriver, hand file, pliers). Here’s what to do:
- Start with a small slab of aluminum sheeting (figure 1). Roll it around a drill bit to create a cylindrical sleeve (figure 2). The drill bit must have the same diameter as the hole in the pinchroller lever.
- Notch little teeth into one end of the new sleeve (figure 3). Slip the sleeve over a drill bit and use it as a cutter to enlarge the hole in the lever (figure 4).
- Thread the cylindrical sleeve inside the hole. It is important to make sure that the open joint in the sleeve cylinder is on the opposite side of the hole from where the screws holes are located (the joint should be on the inside of the lever, nearest the film path).
- Glue the new sleeve inside the enlarged hole with Cyanoacrylate glue (sold as Superglue, Krazy Glue, or “Attak” in Italy).
- Drill screw holes into the cylinder that correspond with the existing screw holes in the pinchroller lever. This is vital to solidly attach the lever to the shaft (figure 5).
The result of all your hard work is a retrofitted pinch roller lever that is far stronger than the original. It duplicates the changes that Elmo made to the later series of GS1200 projectors and should ensure many years of trouble free operation.